P R O J E C T D E S C R I P T I O N :
For my personal project I will be completing the hardest challenge to any baker, a classic wedding cake. Throughout the 9 months this project lasts, I shall learn the several techniques towards mastering the decorations and details that make this dessert whole. after completing the final cake, I will donate it to a humble couple that wishes to get married however doesn't have the money to afford a huge celebration.
For my personal project I will be completing the hardest challenge to any baker, a classic wedding cake. Throughout the 9 months this project lasts, I shall learn the several techniques towards mastering the decorations and details that make this dessert whole. after completing the final cake, I will donate it to a humble couple that wishes to get married however doesn't have the money to afford a huge celebration.
5. R E F L E C T I O N
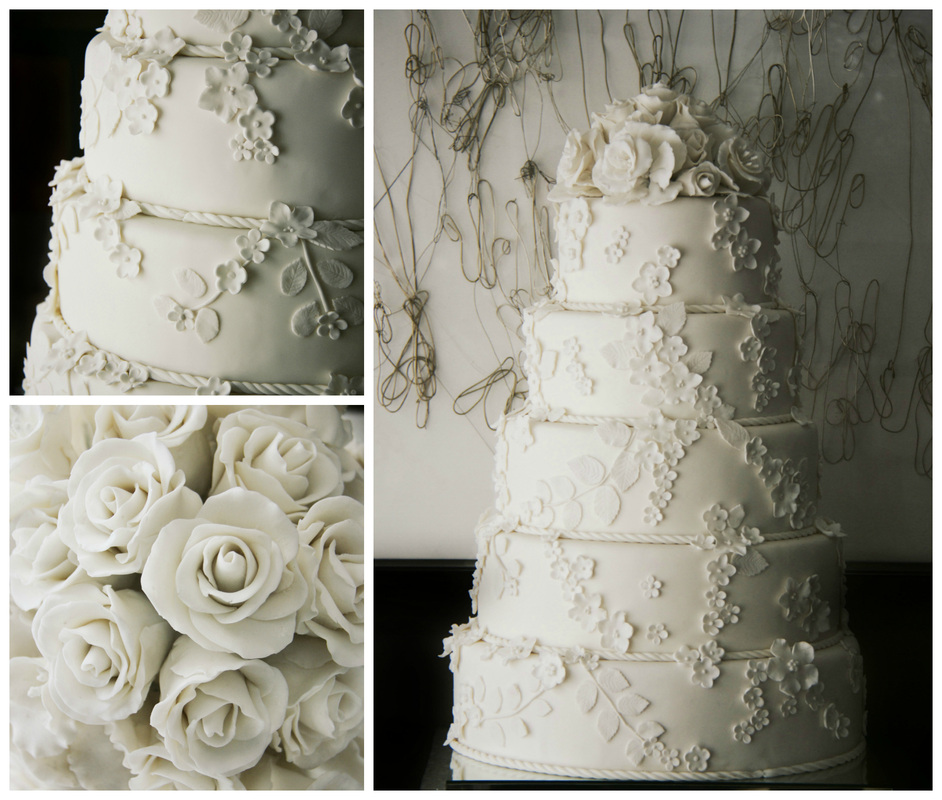
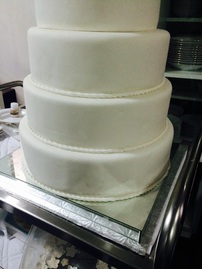
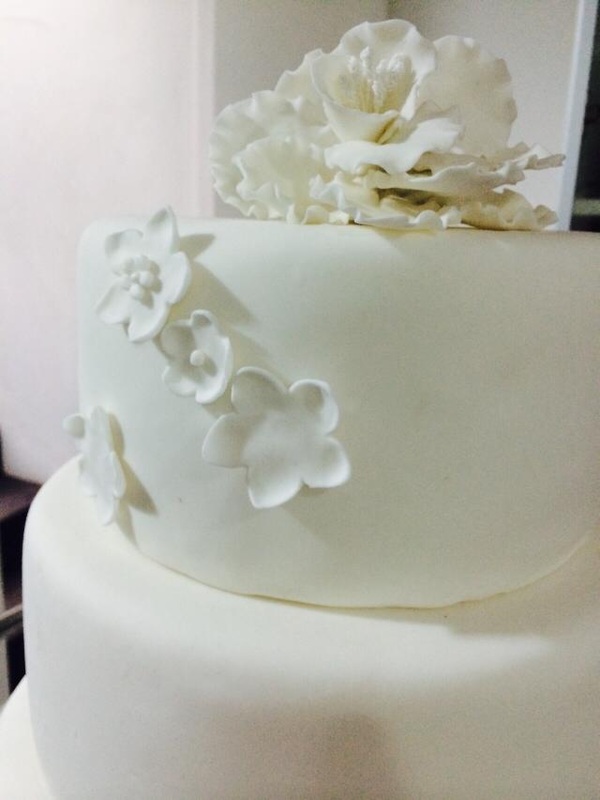
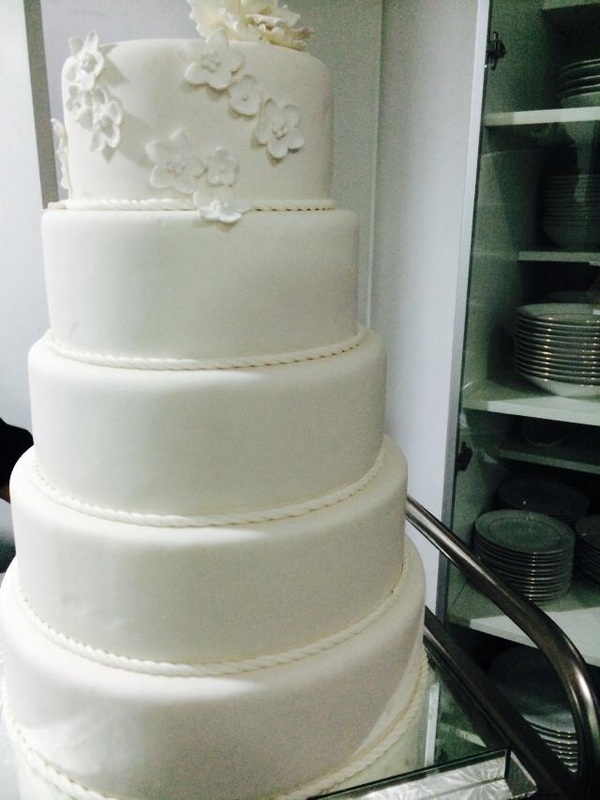
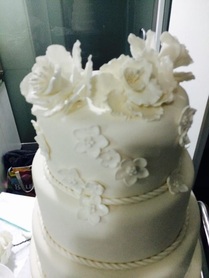
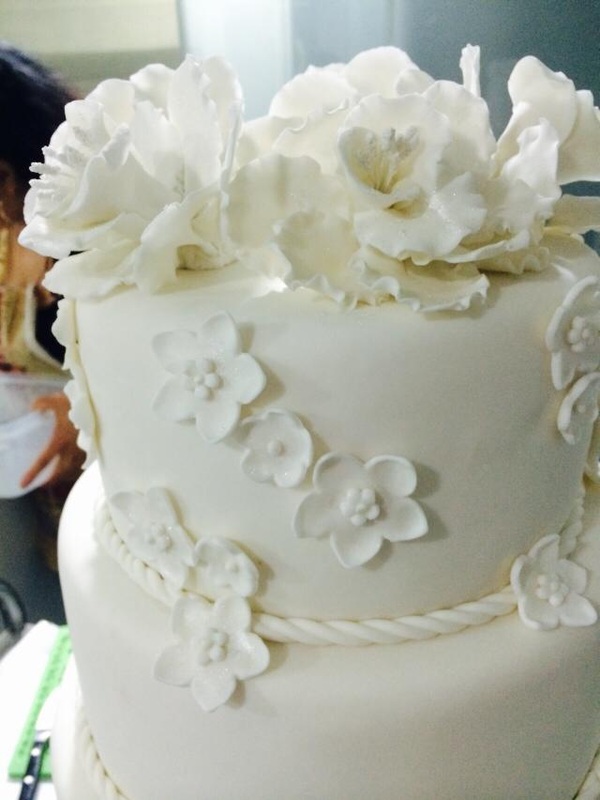
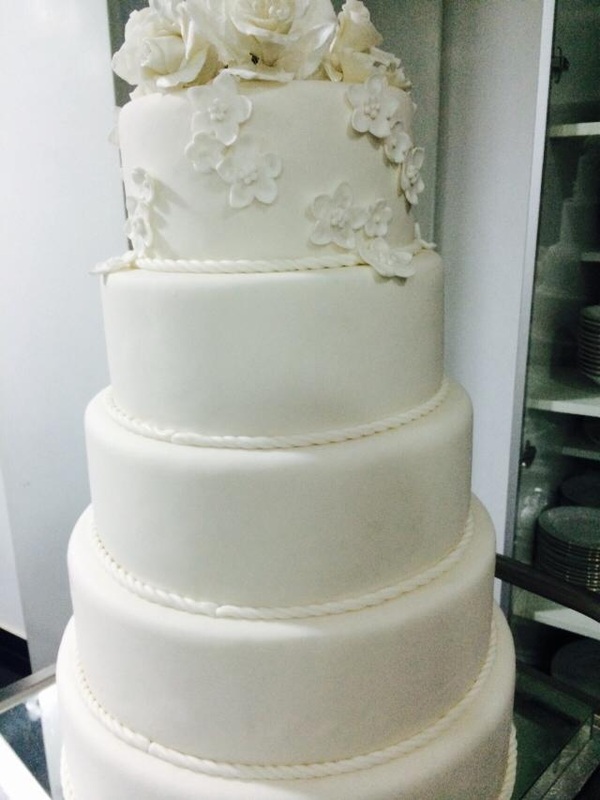
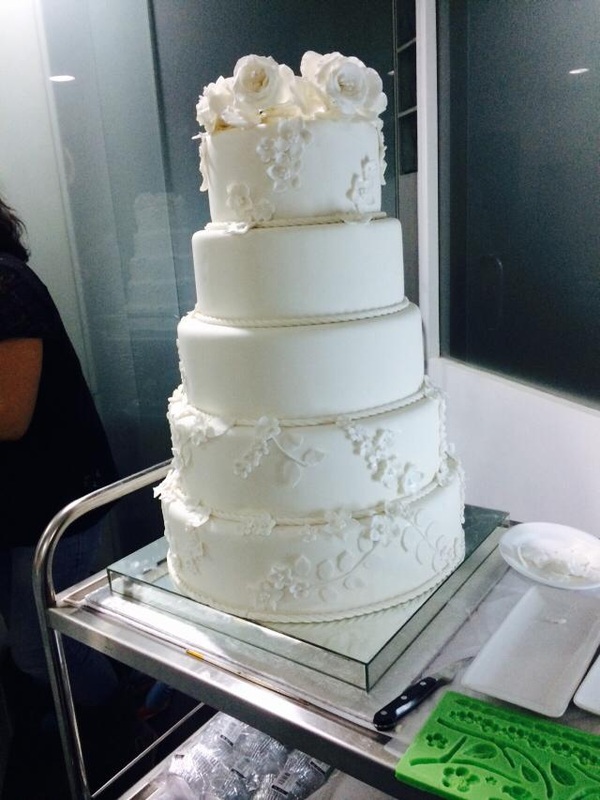
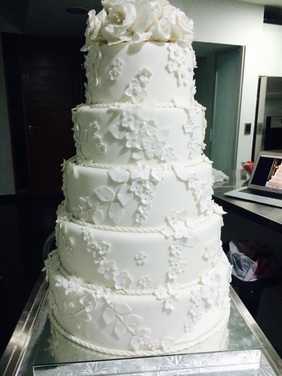
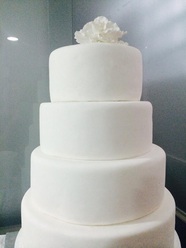
My finished cake:
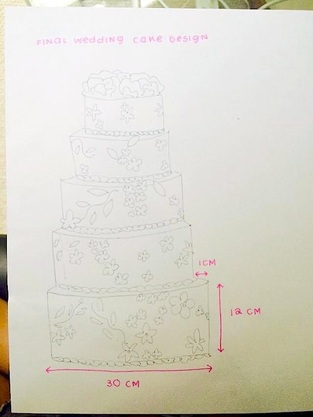
My final design:
4. A C T I O N
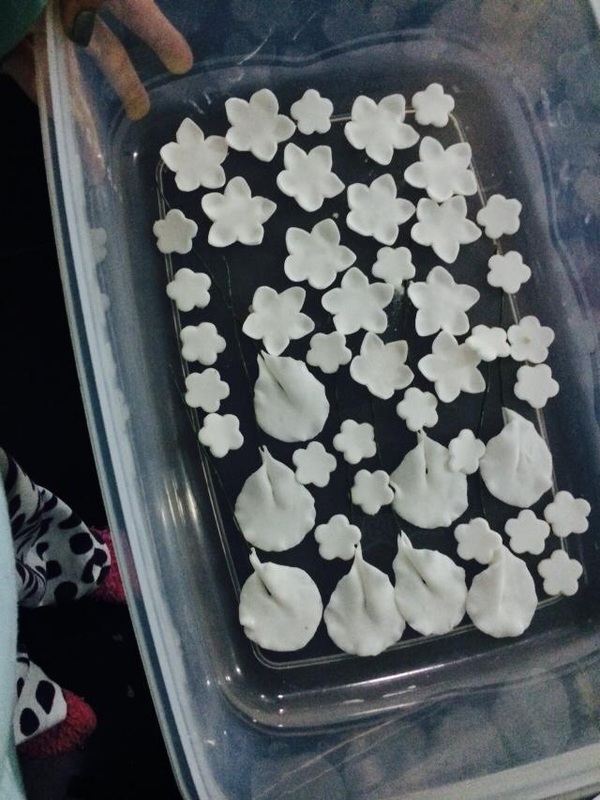
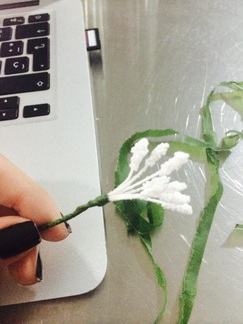
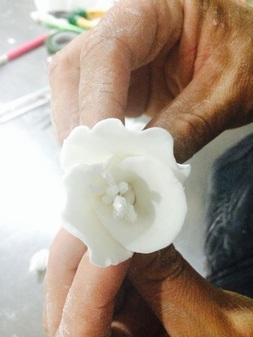
Process of flower making:
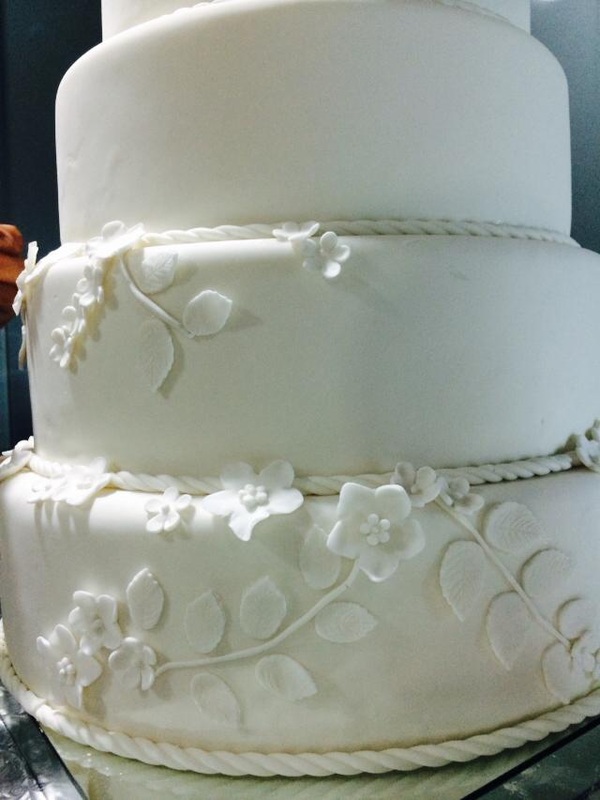
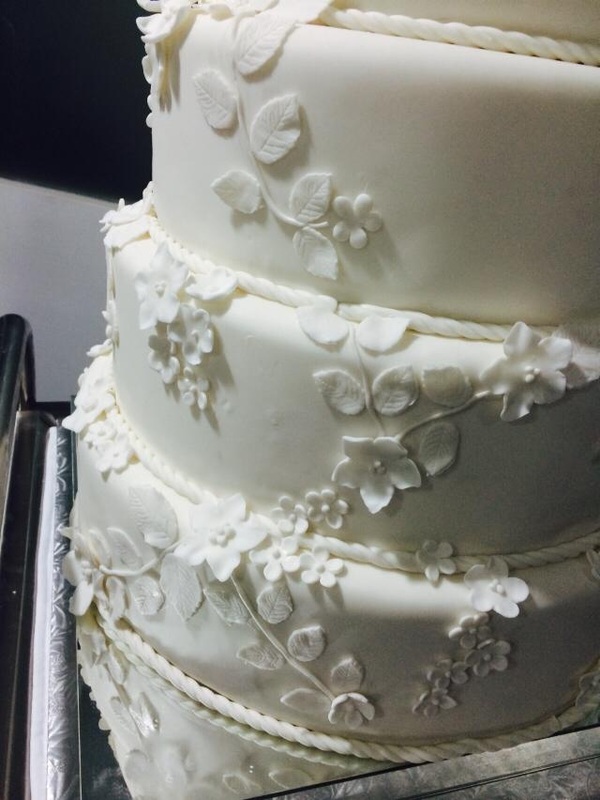
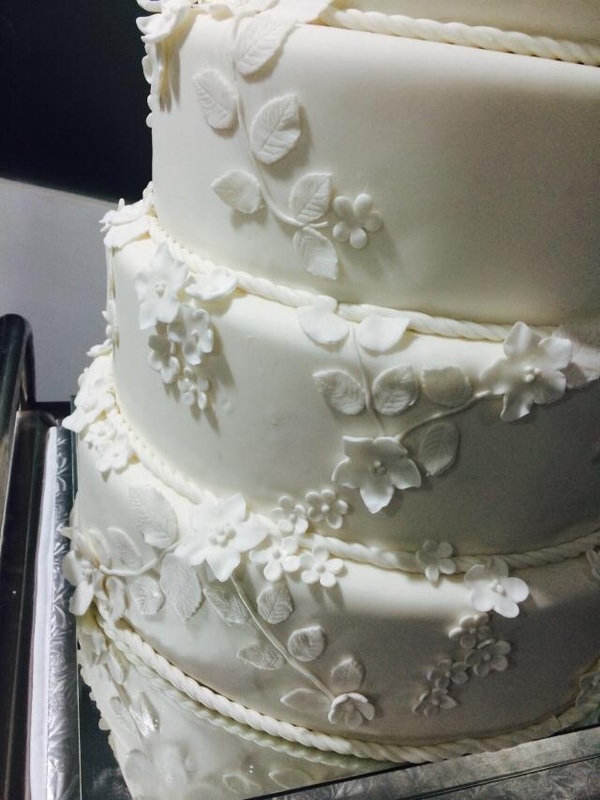
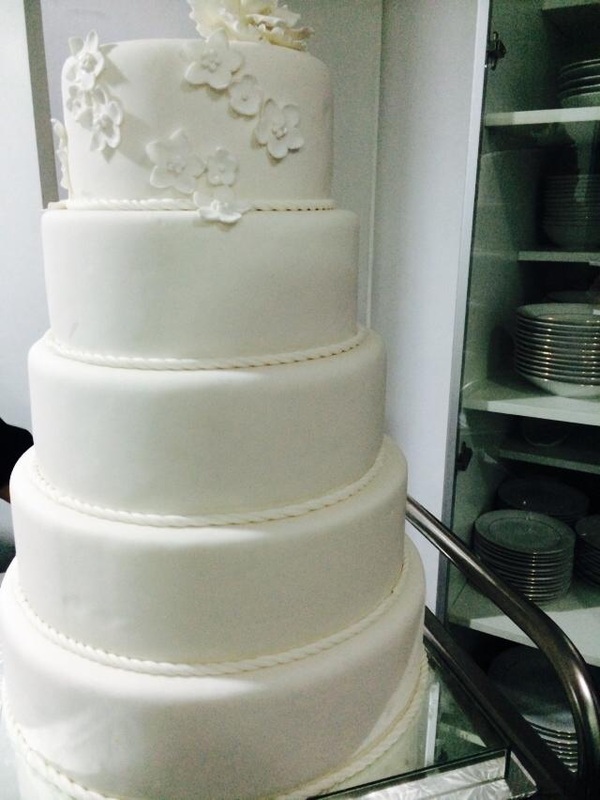
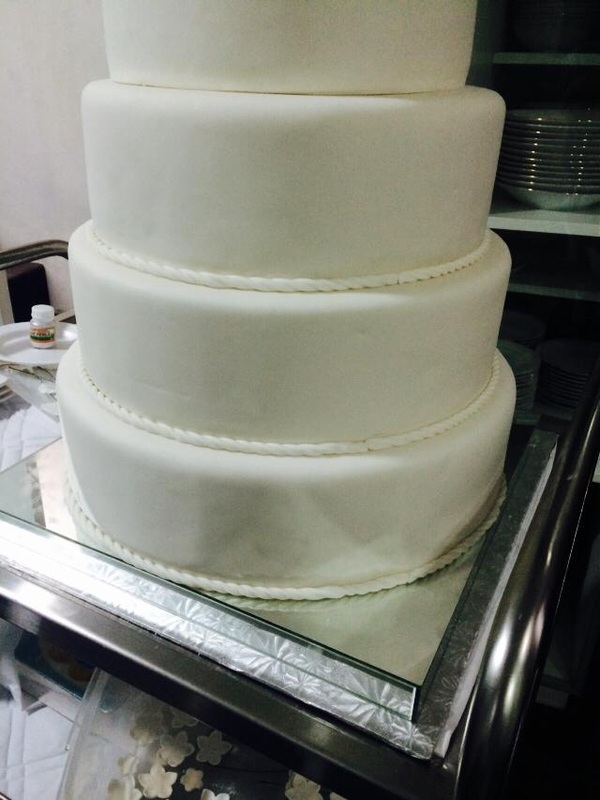
Cake completed!
3. P L A N
Link to plan section:
https://docs.google.com/a/amersol.edu.pe/document/d/1ldAOCDL63s0IbyzyH8KGsQsi9rBymQM0i5v_E_4RsqI/edit
Plan standards:
Before I begin the plan stage of my personal project, I must set the standards and requirements in order to have an organised division of time
The plan must:
Divide the time efficiently depending on the level of difficulty of the step
Include every decoration needed for final cake
Have spare classes for re-learning the steps that may have needed more time
Initial brainstorm for rubric:
The levels of evaluation (specifications):
Excellent: Cake looks visually appealing, flowers look professional and neatly made, it follows ALL specifications and looks EXACTLY or almost exactly the same as the design
Good: The cake looks fine, flowers are presentable and still follow the required patterns, the following of the design is still evident
Satisfactory: The cake is acceptable, however obvious improvements are visible, you can see the basics of the design and some flowers follow required pattern.
Poor: Failed to complete the cake, or the above standards.
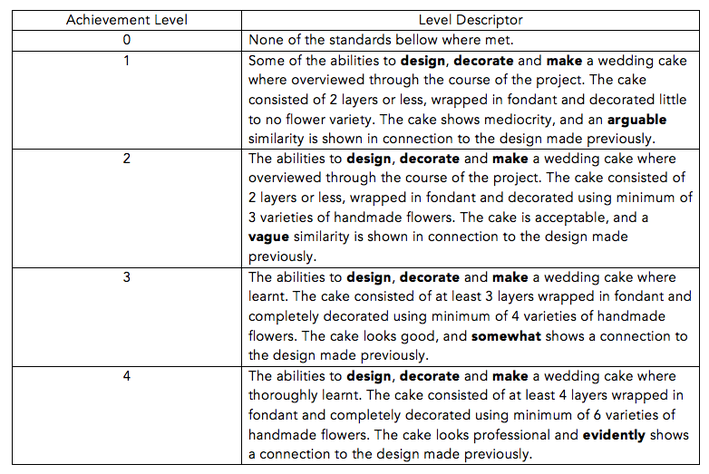
The FINAL rubric:
Materials or ingredients needed:
1. The fondant dough 7. Baking pan 13. Butter
2. Flower shapers 8. Royal Icing 14. Flour
3. Flower hangers 9. Cake plate 15. Sugar
4. Flower cutters 10. Oven 17. Baking Powder
5. Leaf shapers 11. Cake cutters 18. Eggs
6. Foam pallet 12. Butter 19. Vanilla essence
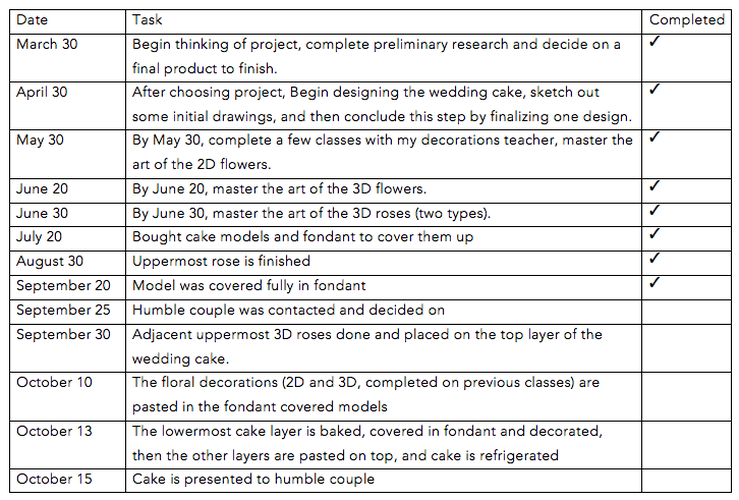
The FINAL plan:
1. The fondant dough 7. Baking pan 13. Butter
2. Flower shapers 8. Royal Icing 14. Flour
3. Flower hangers 9. Cake plate 15. Sugar
4. Flower cutters 10. Oven 17. Baking Powder
5. Leaf shapers 11. Cake cutters 18. Eggs
6. Foam pallet 12. Butter 19. Vanilla essence
The FINAL plan:
2. I N V E S T I G A T E
Link to investigate report:
https://docs.google.com/a/amersol.edu.pe/document/d/1Qp9JcOIF5qBxRJ7cZOLSfsMnCgtprmBX9A0ajDp4V3E/edit
Investigate:
To finalize the Middle Years Programme, students have to undergo the process of devising and taking into action a project of their choosing; For my personal project I will be completing the hardest challenge to any baker: designing, baking and decorating a classic wedding cake. Throughout the 9 months this project lasts, I shall learn the several techniques towards mastering the small details that make this dessert a whole complex piece. The project must be completed before the fifteenth of October, and after its completion, the final cake will be donated to a humble couple from the municipality, that wishes to get married however doesn't have the money to afford a huge celebration.
The goal I have set myself for completion this fifteenth of october follows the S.M.A.R.T. goal factors: specific, measurable, agreed upon, realistic ,and timely. This is so, since I have chosen to follow a project that specifies objectively each section towards it: who, what, when, where, and why. It happens to be measurable obviously since the factor I will be manipulating is quite visual and aesthetic, which gives me an advantage in the area of grading. Agreed Upon, taking in hand both my mentor and the Personal Project director have approved it. And finally realistic and timely, seeing as I have successfully created a plan visible below in the plan section, where I directly state how its completion will be happening before the date it is due.
I chose This project mainly because I have been very fond of bakery ever since I was a child. I find baking a form of expressing my inner self, while creating something great from simple, daily ingredients. This is the main reason why my Personal Project directly links to the global context: “Personal and Cultural Expression”. I plan on creating a cake that not only displays professionalism and the skills learnt, but that shows my own personal touch within it. I want to use my creativity and insight to reflect myself into my creations and make a beautiful final product.
Before beginning my personal project I had some general knowledge on baking as it is. I knew how to make cakes and decorate cupcakes however I didn’t know how to mix those two culinary elements together. I applied the concepts I already knew, and used them to benefit my cake making, however I had no idea how much more there was yet to learn!
For the researching section of my wedding cake project, I stumbled upon several online sources that helped my personal development, however the best sources weren’t virtual. For my investigation, I had the opportunity to go interview a famous wedding cake maker, from Casa Gourmet, a well known desserts store here in Lima. She taught me a lot through answering some simple questions available on the appendix section below. I also had the chance to learn from a cake decorator who taught me a total of 15 classes since the start of my create stage, and I have to say I owe it to her for most of my learning so far. Wilton books and tutorials were of great help too, but I still believe that one is capable of learning mostly by doing rather than reading, so that is exactly what I did.
|
Important videos:
Howcast-Food: https://www.youtube.com/watch?v=Q9iquCQGFKU https://www.youtube.com/watch?v=WdC2K8O3FjU https://www.youtube.com/watch?v=TeVN--kxy08 https://www.youtube.com/watch?v=tRkGUNbq_rk https://www.youtube.com/watch?v=G1gSP3YlB4M https://www.youtube.com/watch?v=5pKfznRHUoQ https://www.youtube.com/watch?v=aSLEaX7UciU https://www.youtube.com/watch?v=POouUVTT8ic https://www.youtube.com/watch?v=cKeBoLnkZIY https://www.youtube.com/watch?v=XSU1eCGqKX8 |
Other sources:
Interview w. Casa Gourmet owner Wedding cake teacher-Rosa María Wilton wedding design books Recipes for the cake: (inspiration, not copy) http://allrecipes.com/recipes/desserts/cakes/wedding-cake/ http://www.bbcgoodfood.com/recipes/collection/wedding-cake http://www.wedding-cakes-for-you.com/weddingcakerecipes.html |
1. P R O C E S S J O U R N A L
|
Day 30: Class 14 October 7 2014
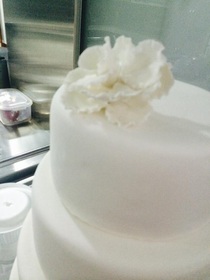
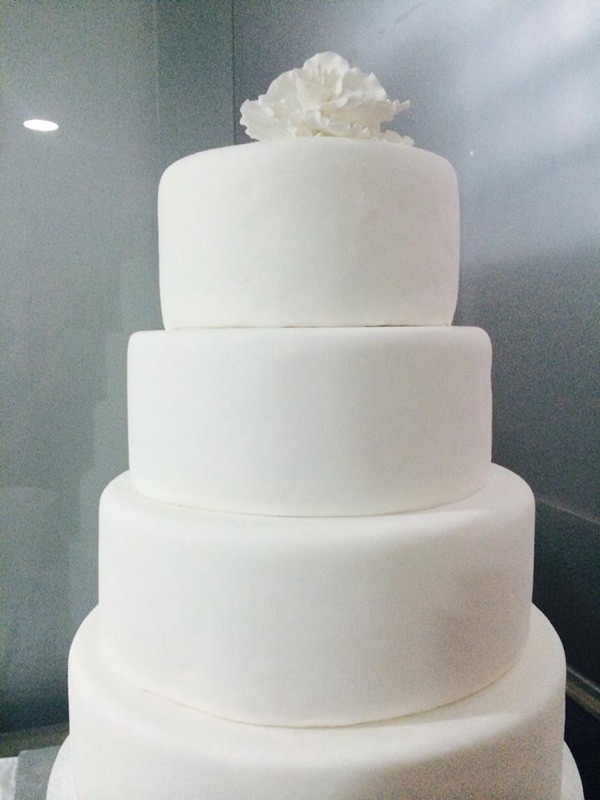
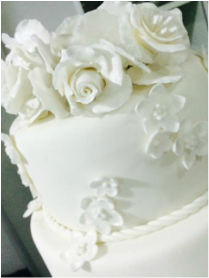
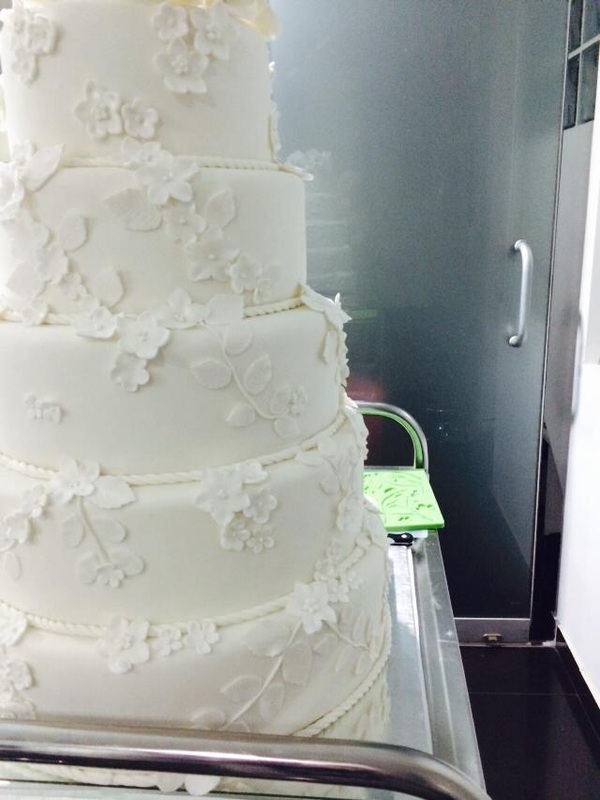
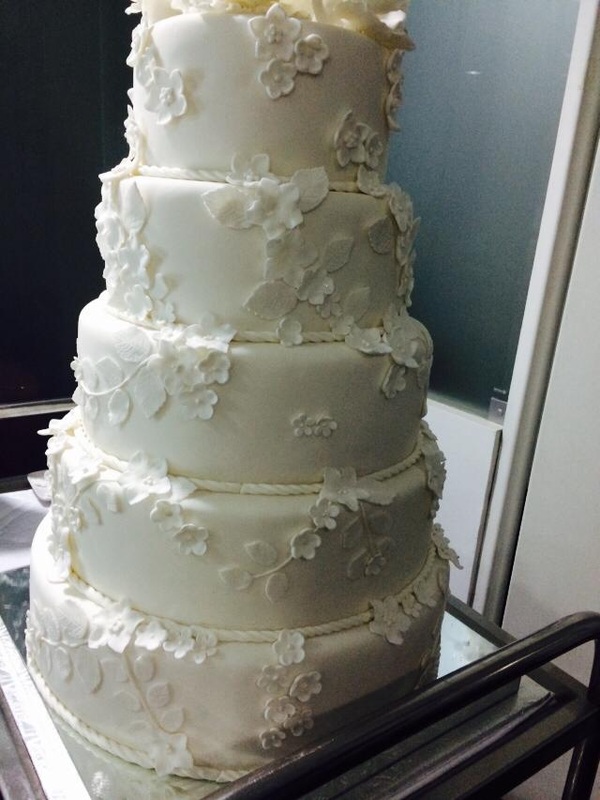
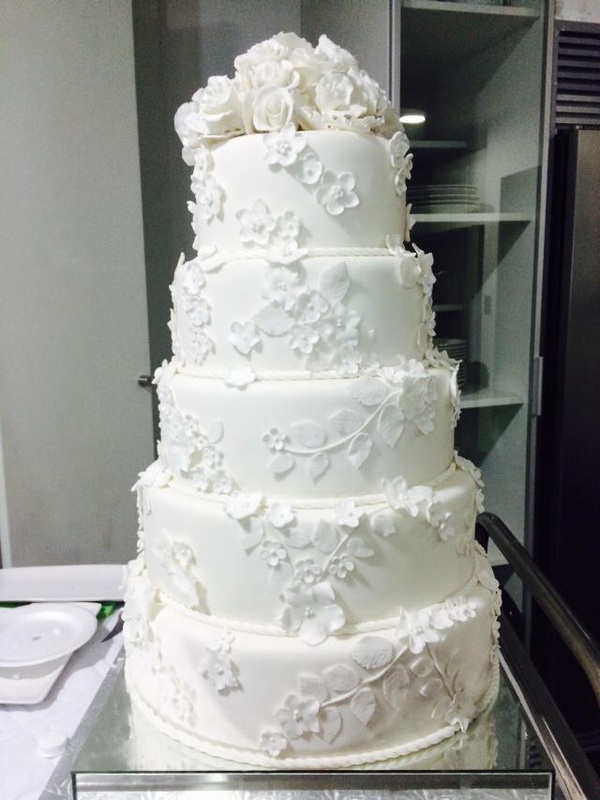
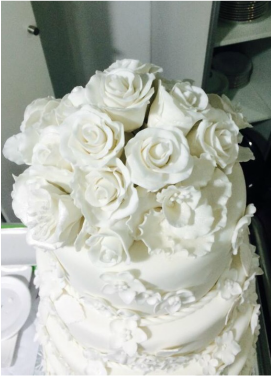
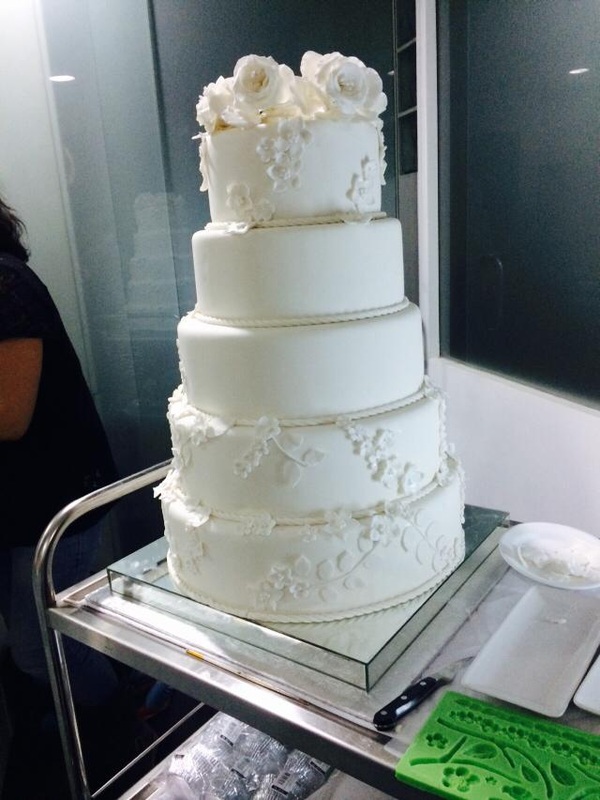
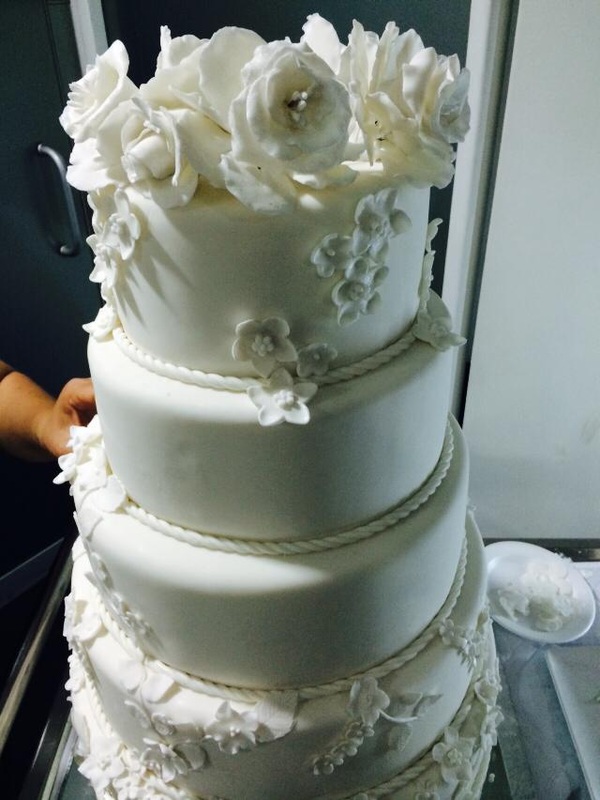
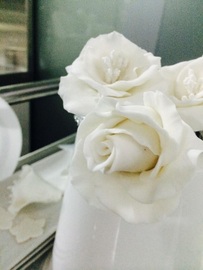
I finished the cake! Finally. It consists of 5 layers fully covered in fondant and gum paste flowers of more than seven varieties. The uppermost level is filled with five beautiful roses that make my cake unique. Critically evaluating my cake, If I had to change something it would be to make the whole cake out of cake rather than only one layer, however since that wasn't in my goal, I think it is ok. I am really proud to see all my hard work paying off in one beautiful piece that truly displays the art of bakery! Can't wait to give it away :') |
Day 29: Class 13 October 3 2014
|
Day 30: Class 12 September 28 2014
As planned, today I completed the upper layer's decorations and had the chance to create a candy cord to hide the seems between the layers. I also was able to Finnish all the flowers that would be pasted next class in order to have less work to do. I can really see the cake coming together! |
Day 28: Class 11 September 28 2014
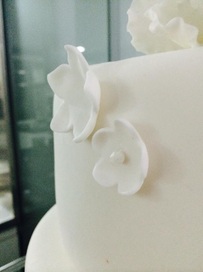
Today with Rosa Maria we did a ton of advancements in the flower making process. We completed the lasting two large flowers to finalise the top layer. I also included a rose to be present on the middle layer of the cake. I made about 20 petals to make these flowers bigger, a complex rose, simple flowers again, I also had the chance to begin pasting the flowers on the cake using edible gluten glue.
Today with Rosa Maria we did a ton of advancements in the flower making process. We completed the lasting two large flowers to finalise the top layer. I also included a rose to be present on the middle layer of the cake. I made about 20 petals to make these flowers bigger, a complex rose, simple flowers again, I also had the chance to begin pasting the flowers on the cake using edible gluten glue.
Day 27: Cake for who? September 23 2014
Day 26: Class 10 September 21 2014
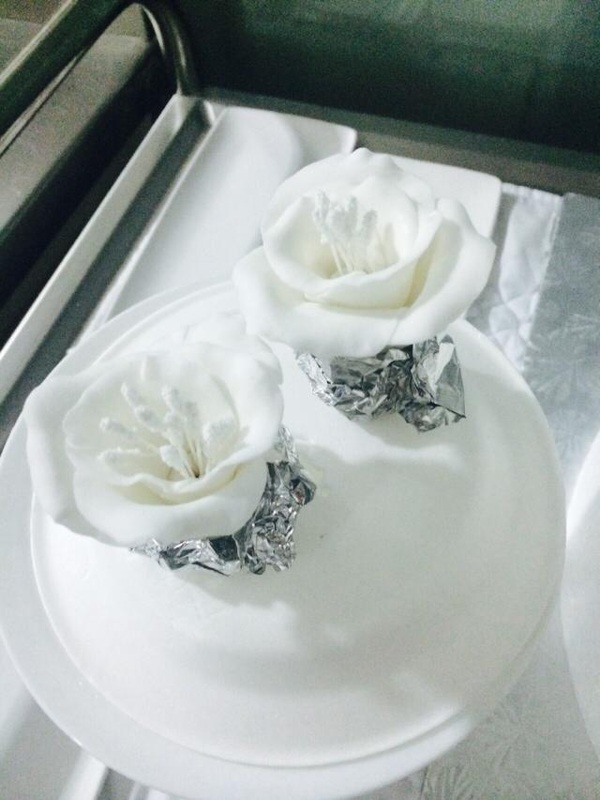
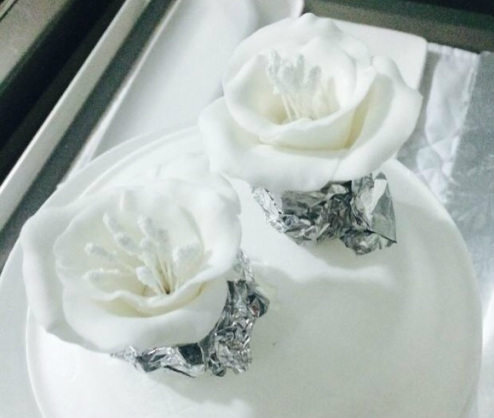
This class I got to complete four other uppermost flowers that would be part of the top floral arrangement. These roses were simpler than the one from last class, maybe because I had already implemented the practice. On the picture to the left is visible the first two bases of the flowers that I created, the one closer to the right was done by me and the one closer to the left by Rosa María. I have to say they look awesome :D! as the classes progress my excitement over the end result rises parallel to my expectations, I know my cake will end up great !
This class I got to complete four other uppermost flowers that would be part of the top floral arrangement. These roses were simpler than the one from last class, maybe because I had already implemented the practice. On the picture to the left is visible the first two bases of the flowers that I created, the one closer to the right was done by me and the one closer to the left by Rosa María. I have to say they look awesome :D! as the classes progress my excitement over the end result rises parallel to my expectations, I know my cake will end up great !
|
Day 24: Class 8 September 1 2014
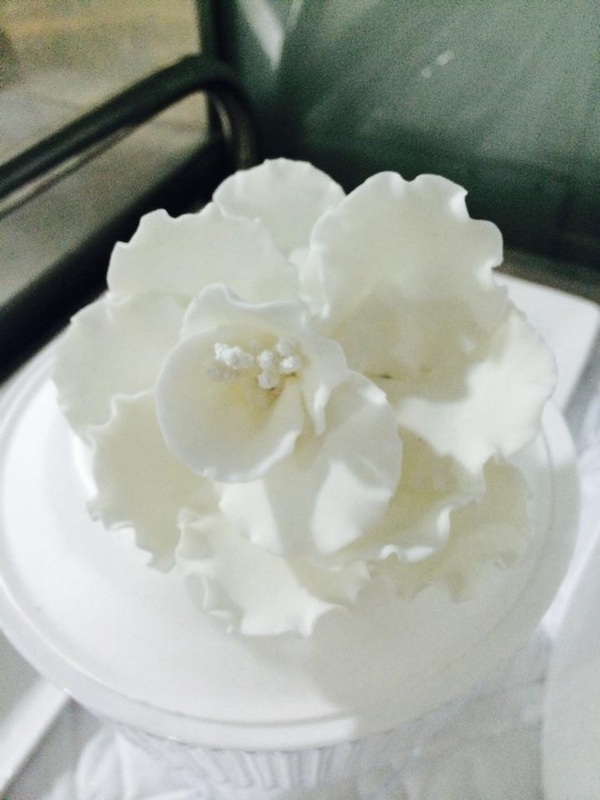
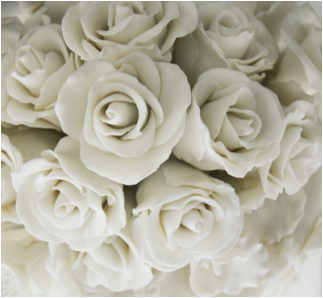
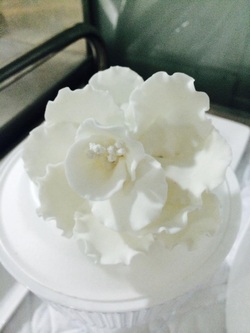
Today Rosa María and I put together the uppermost main flower that will be accompanied by similar roses on its side. This will truly be the final touch to my wedding cake, and probably the most complex and noticeable piece on the final product. This is why I have to make it the best I can so that it pleases the eye of the viewer. After completing my rose, I have to say I was impressed at how good it looked. If I had to evaluate my work on it, I would give myself the feedback that maybe I could have made it more closed up so that on the highest level I could include more flowers. Still this small tweak can be perfected on the next roses I will make, and this beautiful flower can be placed as the centrepiece on the top of my classic wedding cake. |
Day 23: Class 7 August 22 2014
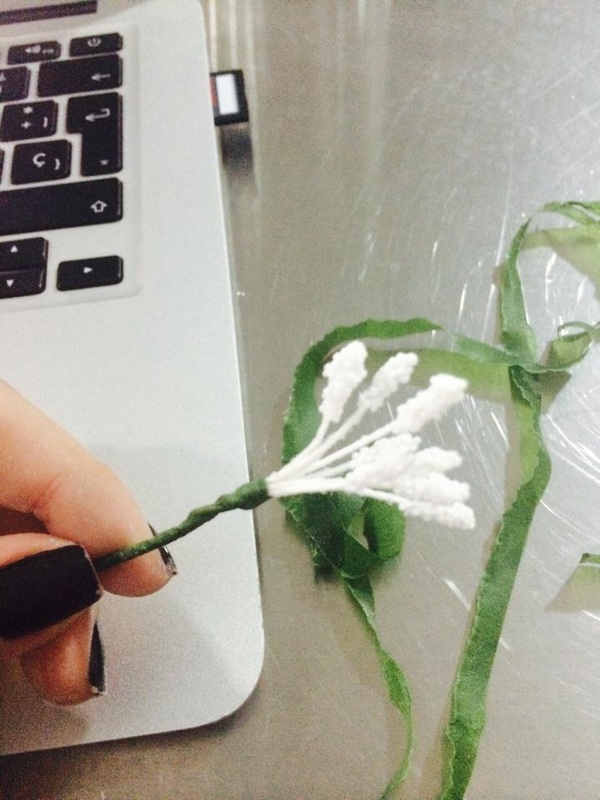
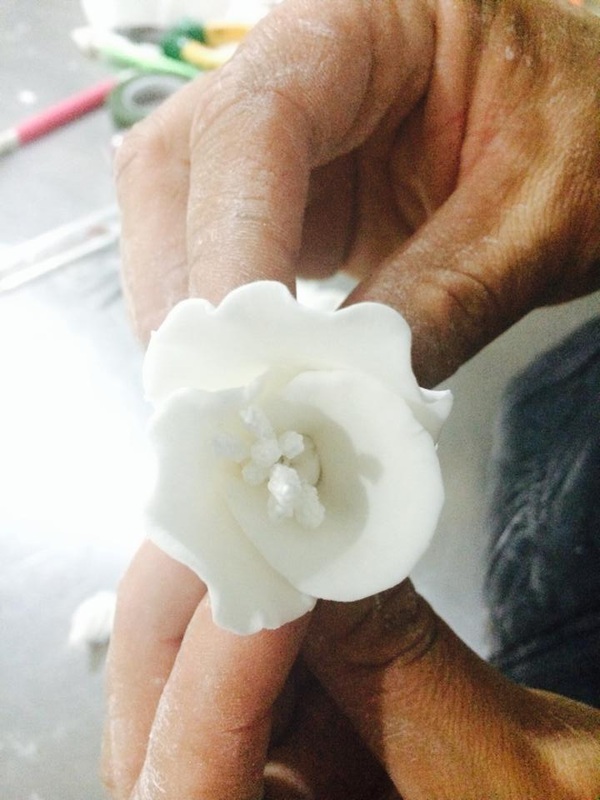
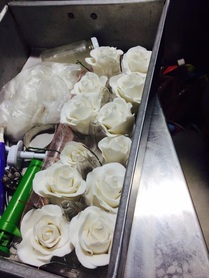
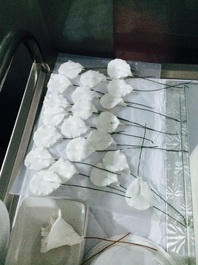
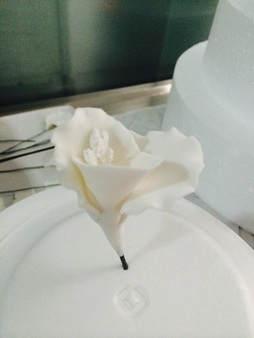
This class as soon as Rosa María came, we went to work. As the day of final product is getting closer and closer, the work is getting harder and harder, however there is nothing I enjoy more than a good challenge! Today we went to the hardest flower of all, the 3D wavy rose. In total we need 2 of these, which are now completed. Bellow you can see the process of making the rose, first starting with the stem that will be stuck into the fondant, next the pollen that is made easily with candy, and then with the flower cutters, shaping the rose to reach the final outcome. I have to say this was truly a hard task, and even though it seemed easy at first I did fail a couple of times until I reached the stage of accomplishment!
This class as soon as Rosa María came, we went to work. As the day of final product is getting closer and closer, the work is getting harder and harder, however there is nothing I enjoy more than a good challenge! Today we went to the hardest flower of all, the 3D wavy rose. In total we need 2 of these, which are now completed. Bellow you can see the process of making the rose, first starting with the stem that will be stuck into the fondant, next the pollen that is made easily with candy, and then with the flower cutters, shaping the rose to reach the final outcome. I have to say this was truly a hard task, and even though it seemed easy at first I did fail a couple of times until I reached the stage of accomplishment!
Day 22: The display August 15 2014
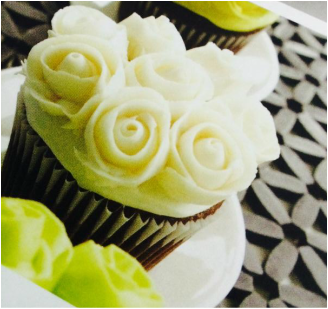
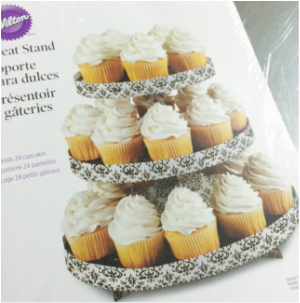
As the exhibition day gets closer and closer, I started to think about how I would display my wedding cake. Taking in hand the size weight and how far away the date of the exhibition is from the day the product has to be completed, I decided that the most convenient form of displaying would be simply to photograph the wedding cake and print a large image of it so that it is clear and visible. I could also in fact make a short video to show it, and the moment of donation. Besides the product, I also wanted to make my exhibition memorable, and I clearly remember last year everybody bundling up to the displays where they gifted food, and since my project is directly linked to bakery I thought maybe I could give away cupcakes. After reading the wilton books before, I remember a very attractive frosting design made from buttercream, and I think that it would look very professional and go along perfectly with the wilton display cupcake board I bought beforehand.
As the exhibition day gets closer and closer, I started to think about how I would display my wedding cake. Taking in hand the size weight and how far away the date of the exhibition is from the day the product has to be completed, I decided that the most convenient form of displaying would be simply to photograph the wedding cake and print a large image of it so that it is clear and visible. I could also in fact make a short video to show it, and the moment of donation. Besides the product, I also wanted to make my exhibition memorable, and I clearly remember last year everybody bundling up to the displays where they gifted food, and since my project is directly linked to bakery I thought maybe I could give away cupcakes. After reading the wilton books before, I remember a very attractive frosting design made from buttercream, and I think that it would look very professional and go along perfectly with the wilton display cupcake board I bought beforehand.
Day 21: Class 6 August 11 2014
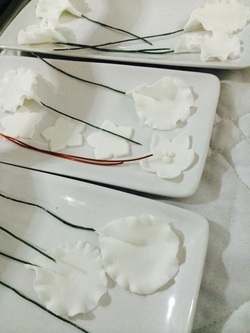
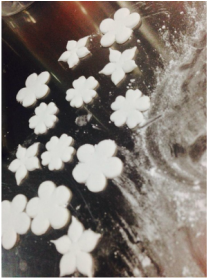
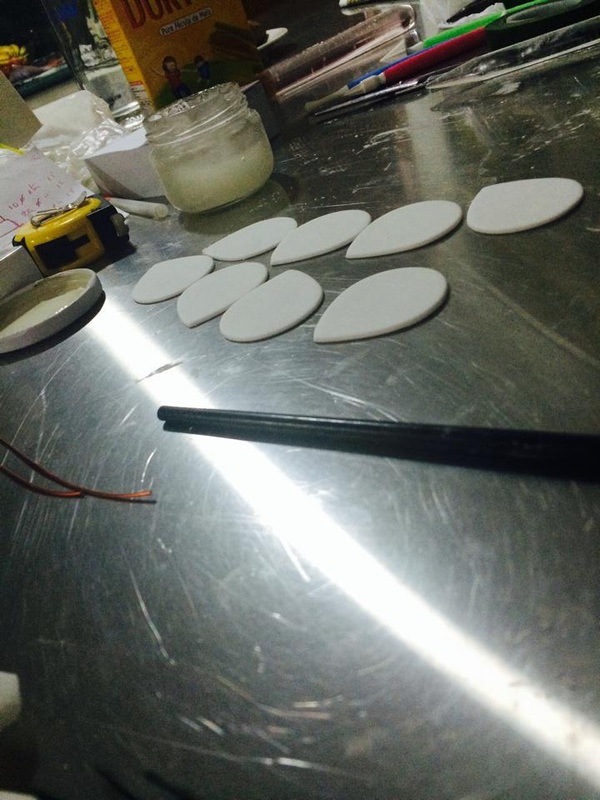
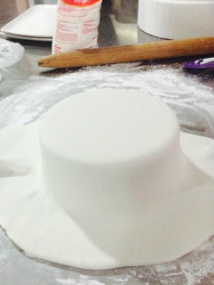
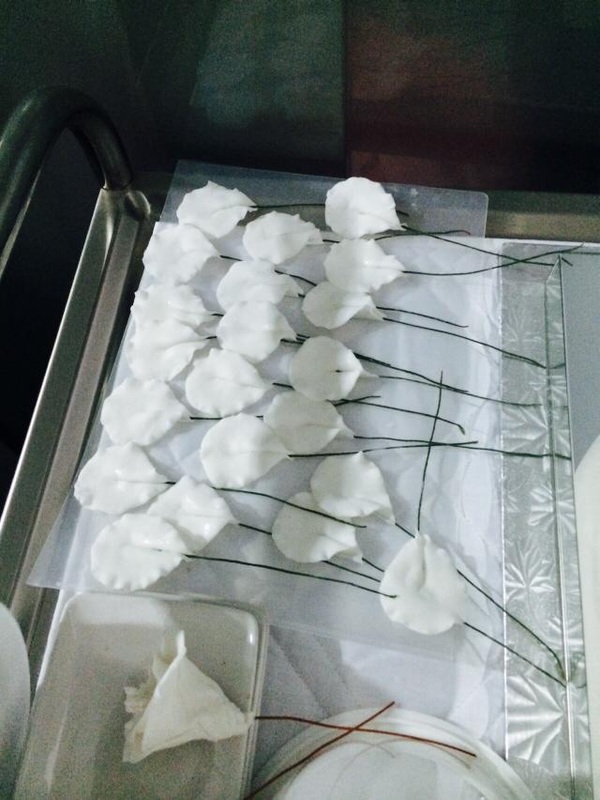
Today I spent the whole class creating different rose petals for the uppermost layer of the cake. When I got tired of doing so, I would simply make more first level 2D flowers so that I could store them up for when the cake is actually going to be decorated. The process of making these petals was the following:
- Get a wire for the stem and cover it with sticky food scotch
- Separately, mold the fondant into a ball and place it over a flour covered surface
- Make the dough thin with a roller
- With a teardrop cutter cut some rose petals
- Grab the drop shaped fondant and with a detailer mold the edges into a wavy fashion
- Place the fondant underneath the wire (3/4ths of the way)
- press upon the fondant until the tip of the wire is not visible
- Let the petal dry for a day or so.
Day 20: Inspiration August 1 2014
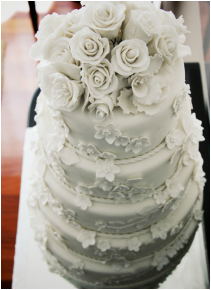
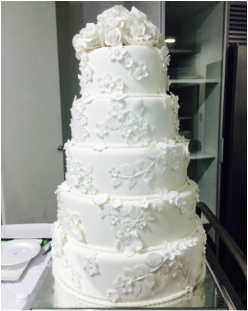
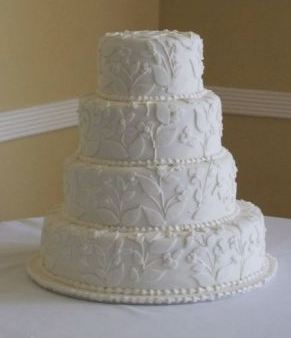
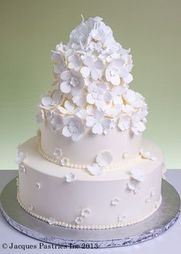
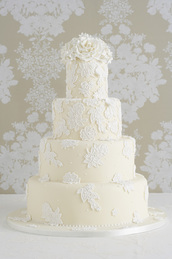
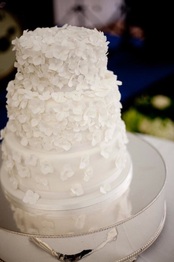
Now that I am getting closer to the day of cake creation, I decided to begin looking for inspiration on other wedding cakes made by professionals, I searched for several white layered cake with floral decorations and this is what I found. None of these designs are exactly similar to mine, however they do give me a good look as to how my cake will turn out. Design number one has the same number of layers as my cake, it has the dotted leaf border, and several floral decorations. The second design has the same flowers I will be using however they happen to be bundled on the upper layers, while my design keeps them spread apart. Deign three has the same uppermost extended rose petals, and the last design has the same scheme of colours, layers and flowers.
Now that I am getting closer to the day of cake creation, I decided to begin looking for inspiration on other wedding cakes made by professionals, I searched for several white layered cake with floral decorations and this is what I found. None of these designs are exactly similar to mine, however they do give me a good look as to how my cake will turn out. Design number one has the same number of layers as my cake, it has the dotted leaf border, and several floral decorations. The second design has the same flowers I will be using however they happen to be bundled on the upper layers, while my design keeps them spread apart. Deign three has the same uppermost extended rose petals, and the last design has the same scheme of colours, layers and flowers.
Day 19: Interview July 22 2014
Today I had the chance to receive back the email from Mariela
Day 18: Class 5 June 25 2014
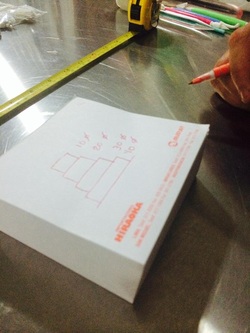
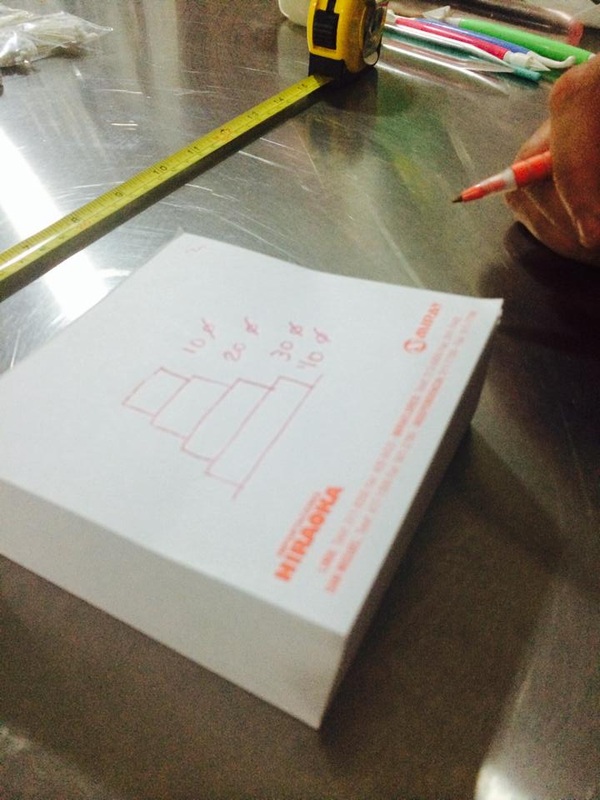
In order to be able to buy the materials: Styrofoam model, fondant covering, base plate, cake ingredients etc. I had to agree upon the measurements of the cake in the first place. Taking this into consideration, today's class consisted mainly on planning.
We concluded that the cake would
We concluded that the cake would
- Have four layers measuring 15 cm height each (60 cm total)
- Have each layer above be of 10 cm less than the one underneath
- Begin with 40 cm of diameter
- Second layer of 30
- Third of 20
- Final layer of 10 cm
Day 17: The big picture July 15 2014
|
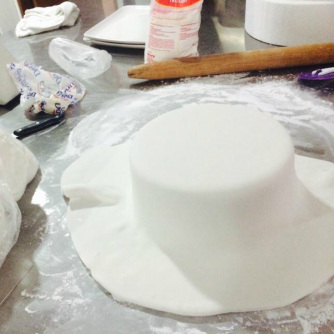
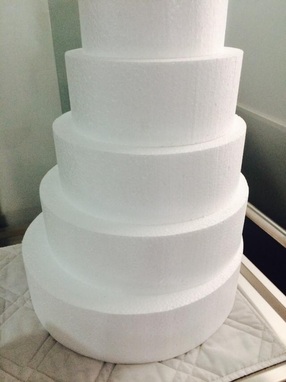
Now that I have mastered all of the flowers that will be present bordering the centres and surroundings of the layers of the cake (without counting the uppermost rose) I have to remember how all of this fits in. After each lesson, I have been storing the flowers made in a container for them to rest and dry, and when the time comes I will place all of them together into the fondant covered cake. After speaking to Rosa María, we agreed that the only layer that would be made out of actual cake would be the last one, this is in order to be able to add more decorations without worrying about the cake. Since this is what will be happening, this means I have to buy styrofoam models to represent cake layers, which will also be covered and decorated with fondant.
|
Day 16: A brief evaluation July 4 2014
Now that I am more advanced into the project itself I decided to evaluate myself only on the aspects mentioned beforehand as my specifications:
Specifications:
Excellent: Cake looks visually appealing, flowers look professional and neatly made, it follows ALL specifications and looks EXACTLY or almost exactly the same as the design
Good: The cake looks fine, flowers are presentable and still follow the required patterns, the following of the design is still evident
Satisfactory: The cake is acceptable, however obvious improvements are visible, you can see the basics of the design and some flowers follow required pattern.
Poor: Failed to complete the cake, or the above standards.
Since the cake hasn't been completed yet, I have decided to evaluate myself against only the coloured sections of my specifications. If I had to qualify my work, I would say right now I'm in the middle, between Excellent and Good. I say this because there is still some room for improvement, however the floral decorations are turning out much better than what I originally expected.
Day 15: Class 4 June 1 2014
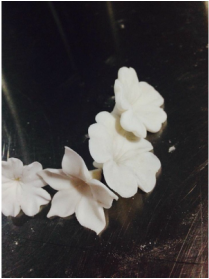
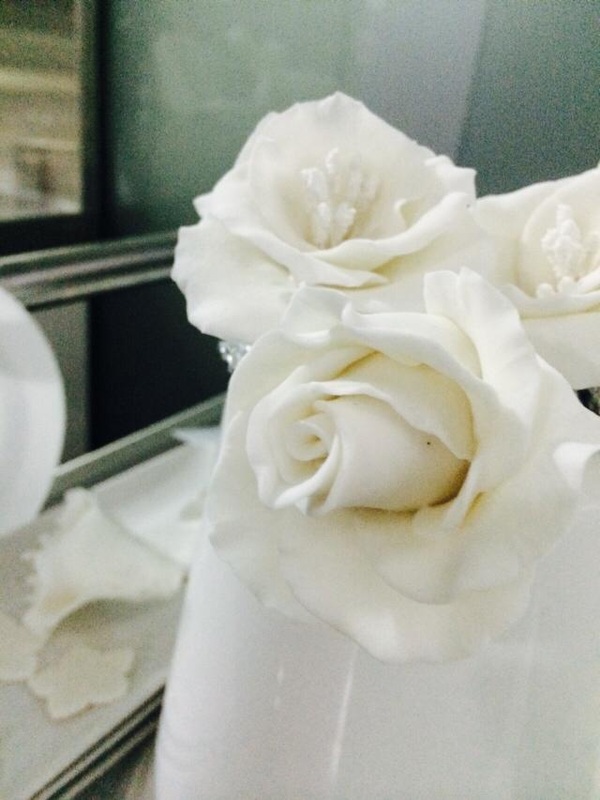
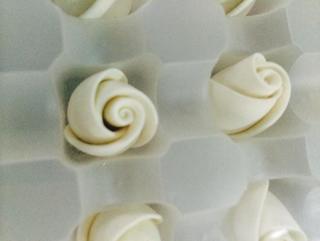
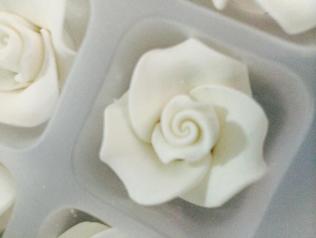
Since I had already learnt the basic principles of the 3D flowers, today's lesson basically consisted on applying the concepts learned into roses that are 3D as well. Taking in hand these flowers are higher on difficulty, I spent a good amount of class simply observing Rosa María make some flowers, however by the end of the class i was impressed at how good my final roses ended up looking! Underneath you can see the two types of roses I made, one opened up and one closed resting in their drying case:
Day 14: Back to the research June 16 2014
Since soon I will be finalising the decorative part of the project, I think I need to go back and do some more research especially taking in hand the only subjects I have been looking for are about the icing. Today I went back and searched sources that talked about the display in general and the cake making itself. Links for possible recipe inspirations and videos are visible above in the investigate section!
Day 13: The plan June 9 2014
Now that I am advanced on the project, I can begin to ask myself the question: Am I following my plan? And to answer sincerely, I believe I am. I have completed my classes up to the date, learning the skills stated upon beforehand, I am up to track on my work and have completed my entries every once in a while when I needed to.
Day 12: Class 3 May 14 2014
|
At the beginning of this class, Rosa María proceeded to explain to me the process of making the 3D flowers. At first she demonstrated a few times how to do it, and as I observed, her movements seemed so simple I wanted to get right into work! However as I attempted to follow her steps, I realised how hard it actually was. I had to try about 10 times until I actually was able to make a few flowers.
|
Day 11: Practicing by myself May 29 2014
|
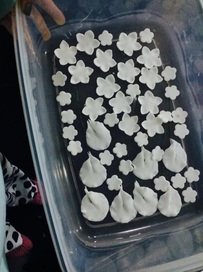
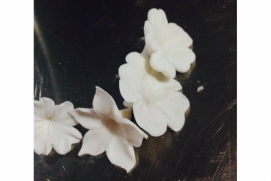
Since today I don't have class with my wedding cake teacher, I have began moulding some simple 2D flowers in order to practice, because after all, that is what makes perfect! I really feel I have gotten a hang of these types of flowers, taking in hand the steps to follow are in fact pretty simple. Now that I am confident I master these sorts of flowers, I can't wait until I have the chance to learn the 3D flowers I hear are much more challenging! So far, I have completed 5 individual flowers of each flower type including the U, clover and teardrop shaped petal floral decorations, and are currently waiting in my kitchen to dry up. I will now store these flowers somewhere dry, and wait until I can finally paste them into the wedding cake :D!
|
Day 10: Class 2 May 5 2014
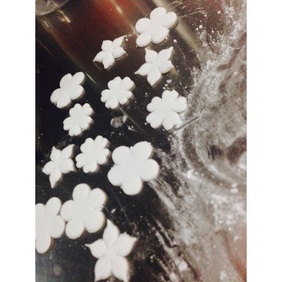
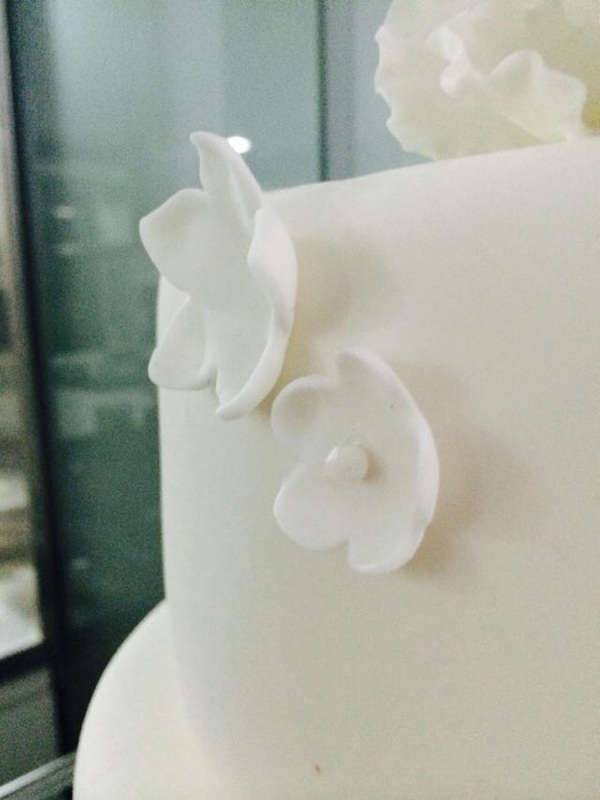
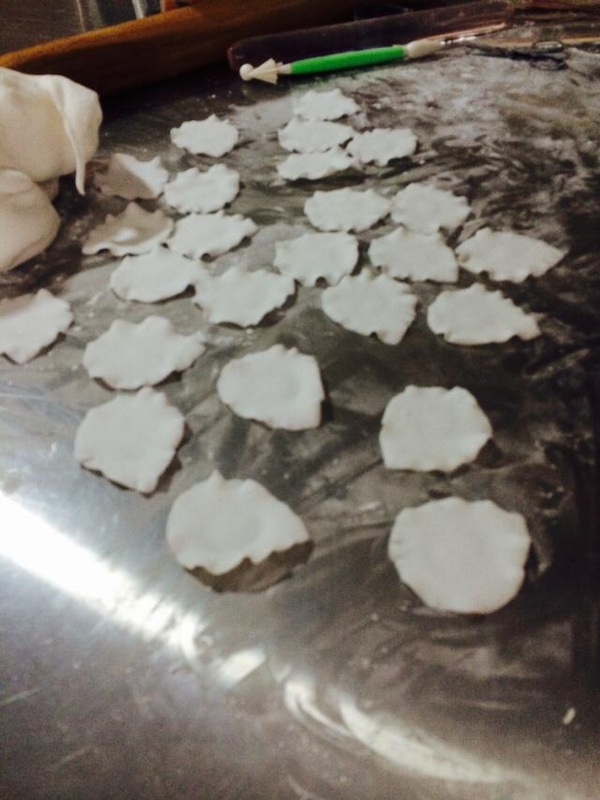
Today, after reading the Wilton decoration books, Rosa María and I finally got to the part of making the flowers. We decided to make all the 2D flowers at once since the task consists of not too many steps:
- First mold the fondant into a sphere
- Then, place it upon a flat surface covered in flour
- Flatten the fondant with a roller
- Using a flower cutter of any shape press on the thin dough
- Let rest for a few seconds and take the fondant carefully out of the cutter
- Repeat, and store in room temperature the flowers to harden
Day 9: Learning by the books May 23 2014
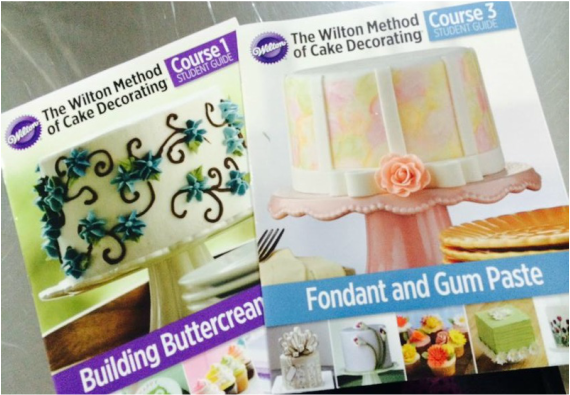
To complete with the homework Rosa María handed to me, I decided to work by myself by reading some books I bought before the project began. These wilton books basically show several decorating techniques that involve the three frostings used for cake decorating: Buttercream, Fondant and gum paste. For my cake I will mostly be applying fondant, however I was thinking that for my display I could give away cupcakes that also apply some buttercream topping.
To complete with the homework Rosa María handed to me, I decided to work by myself by reading some books I bought before the project began. These wilton books basically show several decorating techniques that involve the three frostings used for cake decorating: Buttercream, Fondant and gum paste. For my cake I will mostly be applying fondant, however I was thinking that for my display I could give away cupcakes that also apply some buttercream topping.
Day 8: Class 1 April 30 2014
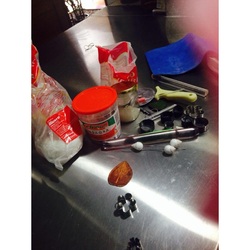
Today I had my first wedding cake class. My teacher, Rosa María, a great wedding cake specialist, who is also an amazing source for my investigation, firstly began by introducing me to the tools and the frostings. She came packed with all sorts of flower cutters and leaf shapers, candy flowers and edible glue, fondant and much more! She gifted me a ball of frosting for me to play around, and get to know the texture and movement of the dough, and after a while of experimented she decided to get to work. I explained to her the project, and together we made a plan (viewable above on the plan section) as to what we would do each class. I told her about my design, and she agreed upon the flowers I mentioned the day before. Today I didn't get the chance to work on flowers of any sort, however she did give me some homework, to research and read about the types of flowers needed.
Day 7: Finalising the design April 23 2014
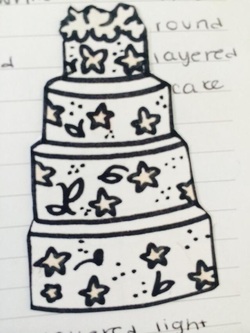
Here on the left, is visible my final cake design. Even though it is not the most professional drawing, the idea is in fact clear, and I have identified the flowers I need to learn how to make:
The flowers are ordered from easiest to hardest.
- Level 1 round shaped 2D flower
- Level 2 teardrop shaped 2D flower
- Level 3 clover shaped 2D flower
- Level 1 round shaped 3D flower
- Level 2 teardrop shaped 3D flower
- Level 3 clover shaped 3D flower
- Leafs and stems
- Uppermost rose petals
- 3D wavy rose
The flowers are ordered from easiest to hardest.
Day 6: Designing April 15 2014
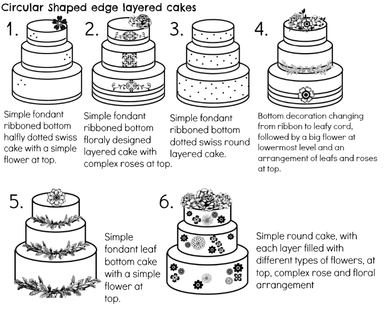
After sketching some initial designs, I began to pass the drawings I most liked on to the computer. I chose the top 6 sketches and digitalised them using an image editing software. I decided not to add color in order to have the freedom of picking any design and then pigmenting the drawing, however as I was looking over the cakes I most liked, I decided to color my final designs all white, since I most cherish traditional wedding cakes. After having chosen the tones and shades for my product, it was time to choose the cake I would be creating, and after viewing the specifications, it was kind of obvious the cake I chose. I ended up deciding on cake number six, solemnly because it had the greatest variety of flowers, which is something that would give me plenty of space to work. All of the designs followed most specifications however I believe number six is the one that will give me the most space to work on. Still there are some evident modifications, since the design is not black and white, I will have to redraw to add the white and bone colours, and also I shall add a fourth layer in, since that was once of my own specifications.
After sketching some initial designs, I began to pass the drawings I most liked on to the computer. I chose the top 6 sketches and digitalised them using an image editing software. I decided not to add color in order to have the freedom of picking any design and then pigmenting the drawing, however as I was looking over the cakes I most liked, I decided to color my final designs all white, since I most cherish traditional wedding cakes. After having chosen the tones and shades for my product, it was time to choose the cake I would be creating, and after viewing the specifications, it was kind of obvious the cake I chose. I ended up deciding on cake number six, solemnly because it had the greatest variety of flowers, which is something that would give me plenty of space to work. All of the designs followed most specifications however I believe number six is the one that will give me the most space to work on. Still there are some evident modifications, since the design is not black and white, I will have to redraw to add the white and bone colours, and also I shall add a fourth layer in, since that was once of my own specifications.
|
Day 5: Rough Drafting April 5 2014
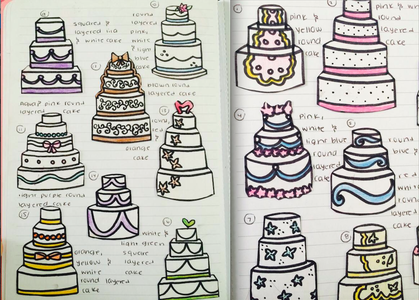
Today I began sketching some initial designs for my wedding cake, these sketches are coloured and labeled, however not all of them follow my initial specs, therefore I will be transferring the best of these into a digitalised image so I can begin the process of elimination..
|
Day 4: My own specs March 31 2014
After viewing at the possible color schemes for my wedding cake, I decided to begin setting some specifications to follow in order to begin designing the cake.
My own Specs:
These are my personal specifications, in order to create a wedding cake that not only shows professionalism, however displays my personal touch.
After viewing at the possible color schemes for my wedding cake, I decided to begin setting some specifications to follow in order to begin designing the cake.
My own Specs:
- The cake must have floral decorations
- Must have at least 3 levels
- There have to be a variety of flowers in order to learn a wider range
- The cake should be of vanilla flavour
- The covering fondant must be white
These are my personal specifications, in order to create a wedding cake that not only shows professionalism, however displays my personal touch.
Day 3: Colors March 27 2014
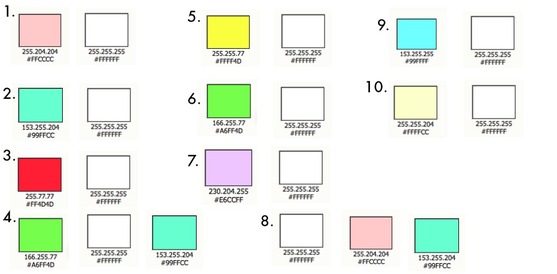
Mixing the colours correctly is the key to making a visually appealing wedding cake. You must carefully combine the different tones and shades of the several pigments available to best fit the occasion, this will be the main decisive factor in weather your cake looks classy or tacky. For birthdays and casual celebrations colourful cakes are the usual, however when it comes to elegant events like weddings, the best pick is pastels mixed with white, assuming this is a traditional wedding.
Possible color schemes
Day 2: Research March 18 2014
I began evaluating, I thought about the ideas that would keep me occupied, and the project that I should be completing. I finally decided that the project that would entertain me the most, and that could offer me the best learning and working experience for decisions on future carriers would be the personal project of designing, decorating and baking a wedding cake.
After picking my project I set myself up to loose no time, so I began researching videos in order to begin seeing and visually learning about the process of cake making. I viewed videos mainly of the youtube channel HowCast, the links are visible on the second section, Investigate above.
Terminology learnt:
Layers: different levels of a certain cake
Royal Icing: An icing that is malleable at first, but hardens when dry. Used for flowers and strong decorations such as bows and ribbons
Pulled sugar: A technique in which boiled sugar is manipulated to make details like flowers
Piping: A decorative technique that uses a pastry bag with a metal tip. Used mainly for swirl and dotted designs depending on the shape of the metal tip and the angle the bag is being held.
Pillars: Candy or edible columns made to hold or support above layers, decorations or simply placed for design reasons
Fondant: A sweet, tasty and hardened frosting made for full coverage of the dough part of the cake
Dotted swiss: A technique that consists on adding dots in an ordered fashion
Day 1: The Project March 12 2014
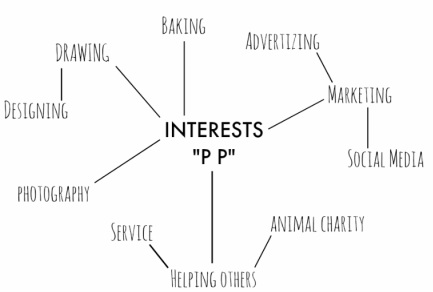
Today we began thinking about the personal projects. We were introduced to the task we would be completing over the course of the following months. We were told tips on how to come up with a project, so I decided to start by brainstorming an idea web. ->
Looking at my interests, I had the chance to think over some possible projects that linked some hobbies together:
- Make a picture book to raise awareness on stray dogs
- Making a recipe book on healthy meals
- Learning how to do a wedding cake and donate it to a humble couple
- Writing and illustrating a collection of children's books and donating it to an orphanage or nursery
